Creating new flags
Read time: 7 minutes
Last edited: Oct 03, 2024
Overview
This topic explains how to create new feature flags in LaunchDarkly. You can use feature flags in any aspect of your application, from the customer-facing user interface (UI) to the backend.
The procedures in this topic assume that you have already configured a LaunchDarkly SDK and are ready to use the LaunchDarkly UI.
By default, flags are only available to server-side SDKs. If you don't check the SDKs using Mobile Key and/or SDKs using client-side ID boxes when creating a flag, then your mobile and client-side SDKs will not be able to evaluate the flag. To learn more, read Make flags available to client-side and mobile SDKs.
In the LaunchDarkly UI, you can create a new flag, clone and modify an existing flag to create new ones, and set default values for flags.
Create a feature flag
You can create and modify feature flags from the Flags list. To learn more, read The Flags list.
To create a feature flag:
- Navigate to the Flags list.
- Click Create flag.
- Enter a unique, human-readable Name.
- (Optional) Update the flag Key. You'll use this key to reference the flag in your code. A suggested key auto-populates from the name you enter, but you can customize it if you wish.
After you save the flag key, you cannot modify it. You can change a flag's name, however, whenever you want.
If your organization requires a specific convention for flag keys, you can configure that in the project settings. To learn more, read Flag key conventions.
Whether your organization uses a specific convention or not, be sure to designate flag keys with naming conventions that the SDKs you use support. For example, if your SDK does not use dot notation, you may not want to use dot notation in your flag keys. If you do, LaunchDarkly automatically converts the key to a format your SDK can use, but this can cause collisions if two flags have similar keys. There are configuration options at the SDK level that help you avoid these issues. To learn more, read Flag keys in the React Web SDK.
- (Optional) Enter a Description of the flag. A brief, human-readable description helps your account members understand what the flag is for. Flag descriptions can include Markdown and inline Confluence links. To learn more about LaunchDarkly's integration with Confluence, read Confluence embedded pages.
- Set or confirm the Maintainer of the flag.
- (Optional) Choose any Metrics to monitor in the Guarded rollout metrics section. To learn more, read Metrics.
- Choose a flag template in the Configuration section. The options are:
- Custom: A flag that you can configure exactly how you wish.
- Release: A temporary flag that initially serves
falseto all targets, then progressively rolls out to 100%. - Kill switch: A permanent flag that enables or disables non-core functionality.
- Experiment: A flag that you can use to test a hypothesis and improve on your findings.
- Migration: A temporary flag used to migrate data or systems while keeping your application available.
- Choose whether the flag should be temporary.
- (Optional) If applicable, follow the instructions for the flag template you chose:
- For a kill switch, experiment, or release flag, select a Flag variations template:
- Choose whether the flag is temporary or permanent.
- Boolean: optionally update the Name of the true and false variations.
- String: enter a Value for each variation, and optionally update the Name of each variation. To add more variations, click +Add variation.
- Number: enter a Value for each variation, and optionally update the Name of each variation. To add more variations, click +Add variation.
- JSON: enter a Value for each variation, and optionally update the Name of each variation. To add more variations, click +Add variation.
- For a migration flag, choose a two-, four-, or six-stage migration.
- (Optional) Update the default variations.
- (Optional, Enterprise plans only) Add one or more prerequisite flags. These prerequisites apply to all environments. You can update them for individual environments after you create the flag.
- (Optional) Choose one or more tags from the Tags menu.
Tags are useful for managing flag permissions using custom roles. For example, you can use a specific tag to determine who has read or write access for the flag. To learn more, read Custom roles.
- Check the SDKs using Mobile Key and/or SDKs using client-side ID boxes to indicate which client-side SDKs you will use to evaluate this flag. If you are using a server-side SDK, leave these boxes unchecked.
- Click Create flag.
The new flag appears in the Flags list.
You can also use the REST API: Create a feature flag
By default, LaunchDarkly allows you to create 5,000 feature flags per project. You can create more upon request, free of charge. To learn more, read How to right size when you are over LaunchDarkly system resource count limits.
Make flags available to client-side and mobile SDKs
By default, flags are only available to server-side SDKs. When you create a flag, you can choose to expose the flag to SDKs which use client-side IDs, SDKs which use mobile keys, or both. If you're using a client-side or mobile SDK, you must expose your feature flags for the client-side or mobile SDKs to evaluate them.
You can choose which SDKs flags are available to on the flag's "Settings" page:
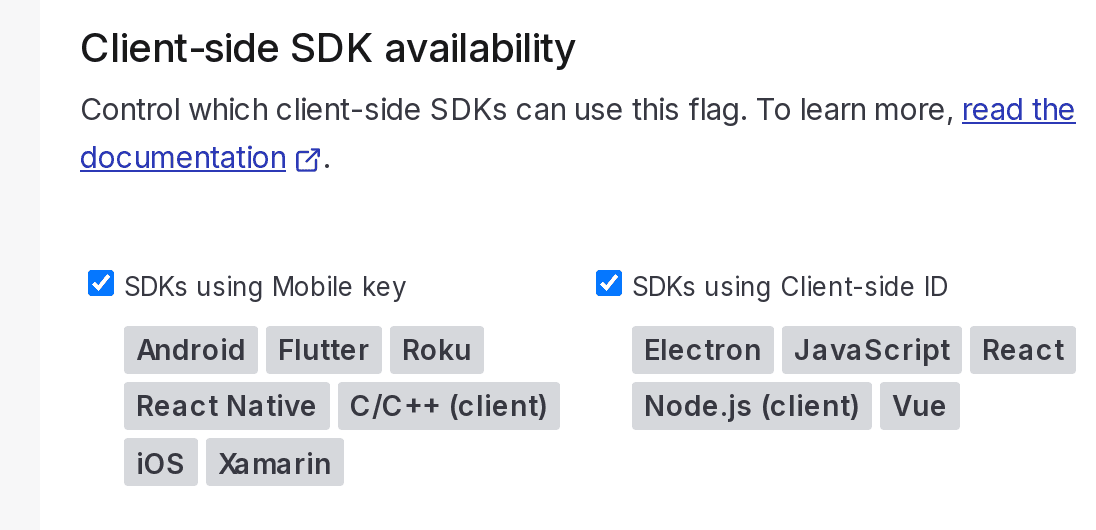
If an SDK tries to evaluate a feature flag that is not available, LaunchDarkly serves the fallback value for that flag.
You can also set the client-side availability for all new flags in a project. To learn how, read Client-side availability.
SDKs for mobile devices use mobile SDK keys, which are readily available to mobile apps. A leaked mobile SDK key allows the holder to circumvent JavaScript's Secure Mode. This can give the holder access to the value of every flag for any context, even without knowing the SDK key that hashes the context key in Secure Mode.
To learn more, read Client-side, server-side, and edge SDKs.
Configure the same flag in different environments
All environments within a project have the same set of feature flags. When you create a new feature flag, it is created in every environment in your LaunchDarkly project. That flag is scoped to your entire project.
Flag scoping refers to the parts of LaunchDarkly where a flag is available or used. If a flag is scoped at the project level, it is available to all environments within the project, because projects contain environments. To learn more about projects, read Projects.
To learn more about environments, read Environments.
Flag configuration settings are specific to each environment. The changes you make in one environment do not apply to the same flag in any other environment. If you want to, you can configure the same flag in a unique way for every environment you have.
To configure a flag in a different environment:
-
Navigate to the Flags list.
-
Click the name of the flag you want to modify.
-
Click on the environment you want to edit the flag in.
- If the environment is not displayed, click the + to display the list of environments, and select the environment you want.
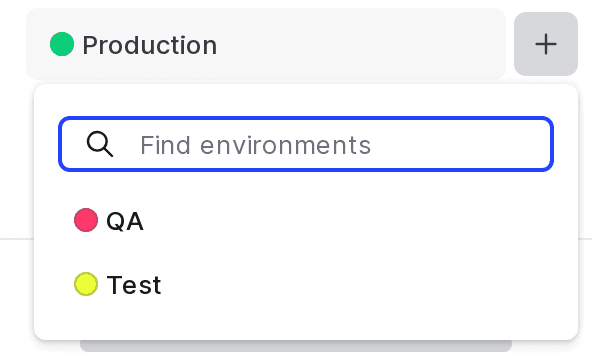
The environment selection menu. -
Make any edits as needed.
-
Click Review and save.
Set default values
When you create a feature flag, some of its variations are designated as default values. You can accept the defaults or change them. When you change default values for a new flag, LaunchDarkly creates the flag across all environments in your project with the new variations set as its default on and off values.

To learn more about default flag values, read Change default flag values.
You can optionally configure default flag settings for a project, which LaunchDarkly will apply to any new flags you create within that project. To learn how, read Flag templates.