Managing experiments
Read time: 4 minutes
Last edited: Oct 16, 2024
Overview
This topic explains how experiment iterations work and how to modify them.
Running experiments
When your experiments are running, you can view information about them on the Experiments list or on the related flag's Experimentation tab. The Experimentation tab displays all the experiments a flag is participating in, including both experiments that are currently recording and experiments that are stopped.
Here are some things you can do with each experiment:
- Stop the experiment or start a new iteration. To learn how, read Starting and stopping experiment iterations.
- Edit the metrics connected to the experiment and start a new iteration.
- View experiment data over set periods of time on the Iterations tab:
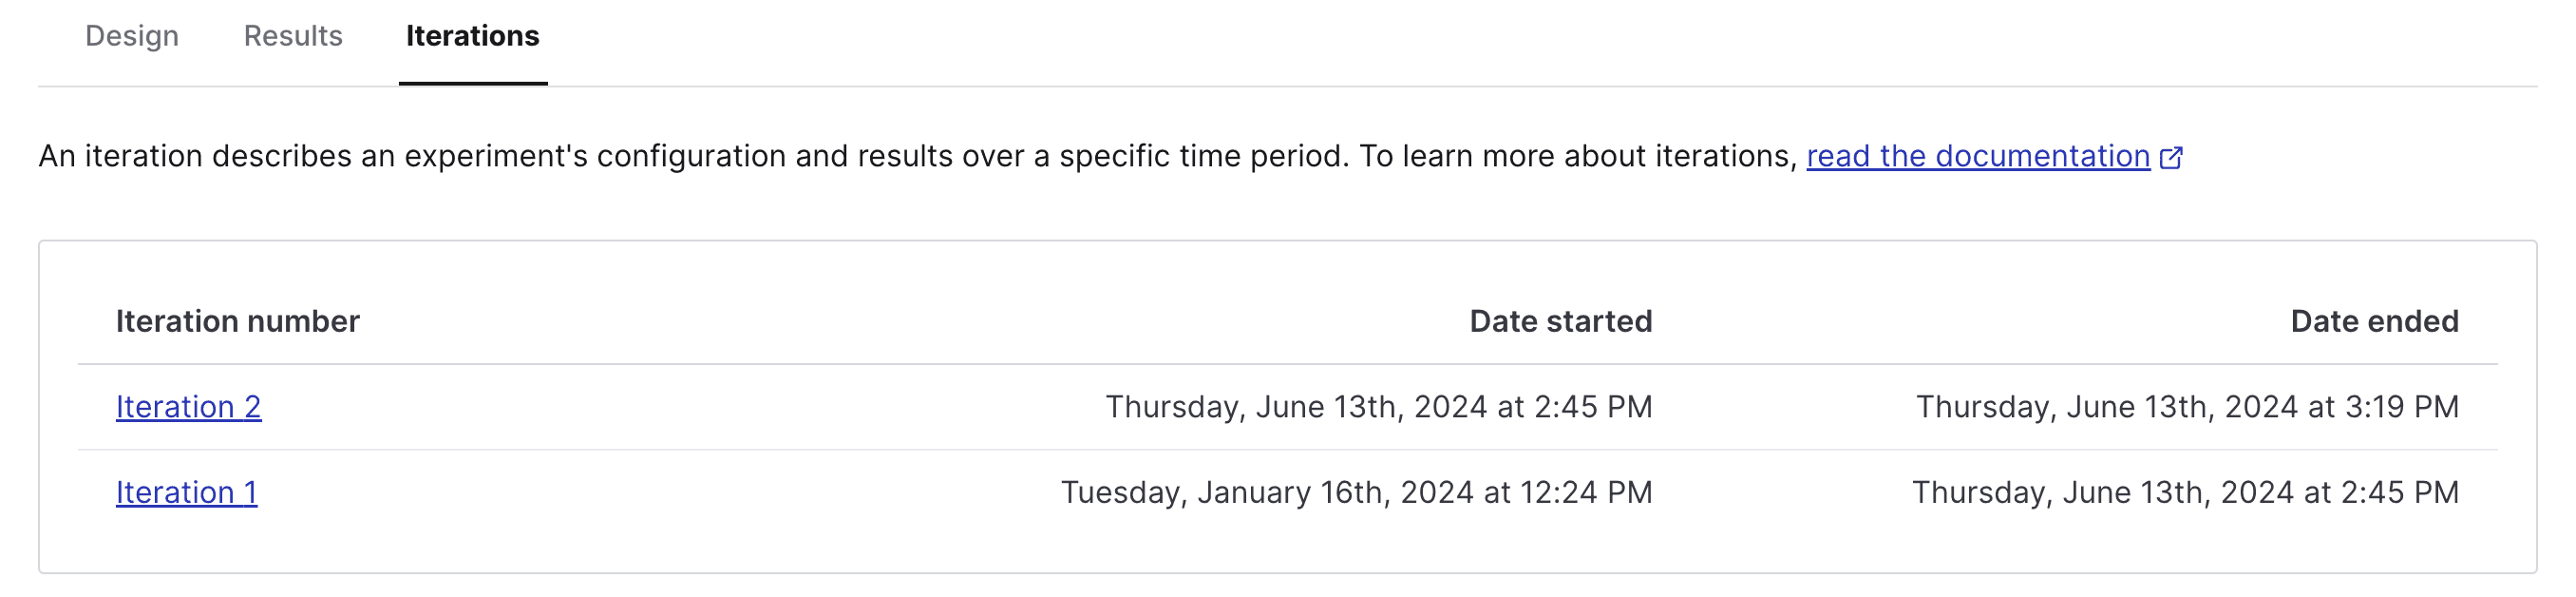
When you start an experiment, LaunchDarkly creates a new iteration for that experiment. Each iteration includes the results of the experiment over a period of time for its specific configuration. When you stop an experiment or edit its configuration, including its hypothesis, metrics, variations, or audience, LaunchDarkly ends the iteration. This ensures that your experiment results are valid.
Edit experiments
You can make changes to the hypothesis, audience, and metrics of an existing experiment.
After you create an experiment, you cannot edit its name, flag, or the flag's variations. If you want to use a different flag or a different flag variation, you must create a new experiment.
Change experiment details
To change an experiment's details:
- Navigate to the Design tab of your experiment.
- Click Edit experiment.
- Navigate to the section you want to edit and click the pencil icon.
- Edit the hypothesis as needed.
- Choose a new randomization unit as needed. To learn more, read Randomization units.
- Scroll to the top of the page and click Save.
- If the experiment was running when you made edits, a "Save experiment design?" dialog appears. Enter a reason for the change and click Save and start new iteration.
Change experiment metrics
If you want to begin measuring a completely different metric as part of an experiment, we recommend creating a new experiment instead of editing an existing one. If you want to use a similar metric, you can change the metric associated with an experiment.
Here's how to change the metric:
- Navigate to the Design tab of your experiment.
- Click Edit experiment.
- Navigate to the "Metrics" section and click the pencil icon.
- Choose new metrics from the "Primary metric" or "Secondary metrics" menus. Scroll to the top of the page and click Save.
- If the experiment was running when you made edits, a "Save experiment design?" dialog appears. Enter a reason for the change and click Save and start new iteration.
Change experiment audiences
To edit the audience of an experiment:
- Navigate to the Design tab of your experiment.
- Click Edit experiment.
- Navigate to the "Audience" section and click the pencil icon.
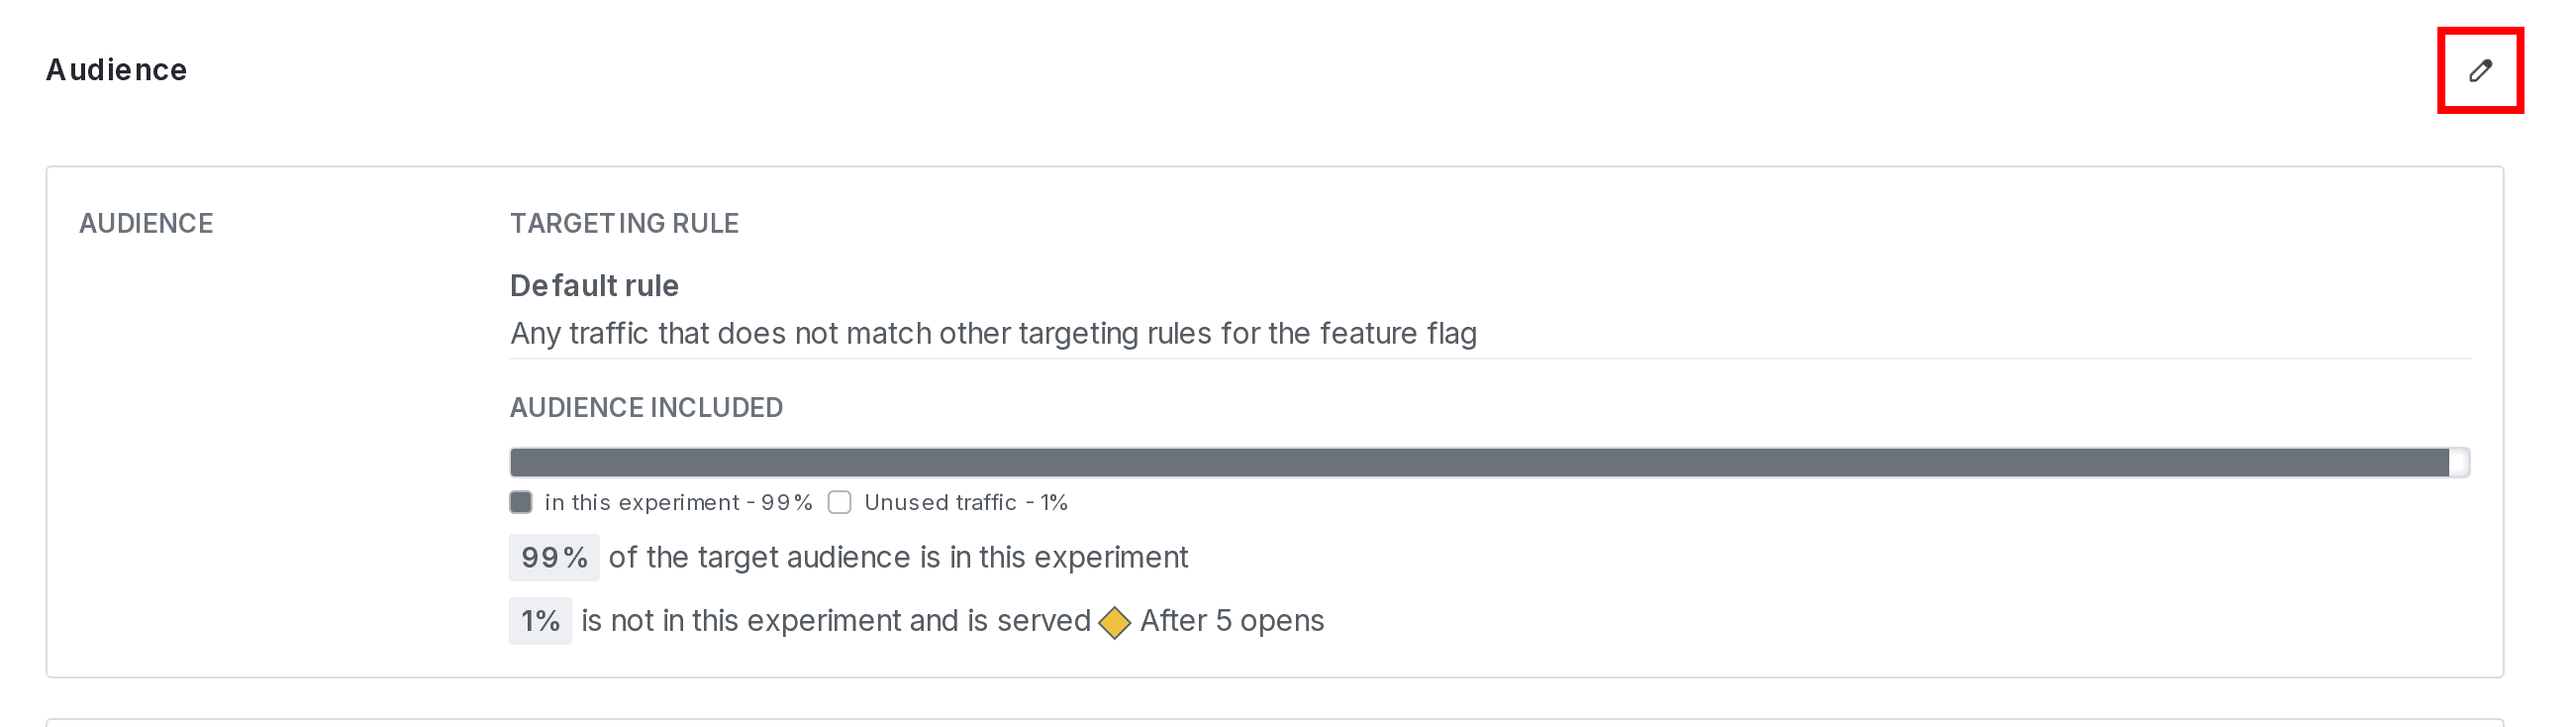
- Add, remove, or change the layer the experiment is included in as needed.
- In the "Define audience" section, increase or decrease the amount of traffic in the experiment as needed.
- (Optional) Advanced: For most experiments, we recommend leaving the Advanced options on their default settings. To learn more, read Carryover bias and variation reassignment.
- In the "Split experiment audience" section, increase or decrease the amount of experiment traffic in each variation, as needed.
- Scroll to the top of the page and click Save.
- If the experiment was running when you made edits, a "Save experiment design?" dialog appears. Enter a reason for the change and click Save and start new iteration.
Archive experiments
You can archive experiments that have concluded, as well as the flags and metrics attached to them, but you cannot permanently delete experiments. Archiving experiments preserves the results so you can refer to them in the future.
Before you can archive an experiment:
- The experiment must not be running. To learn how to stop an experiment, read Stop experiment iterations.
- The experiment must not be included in a layer. To learn how to remove an experiment from a layer, read Remove experiments from layers.
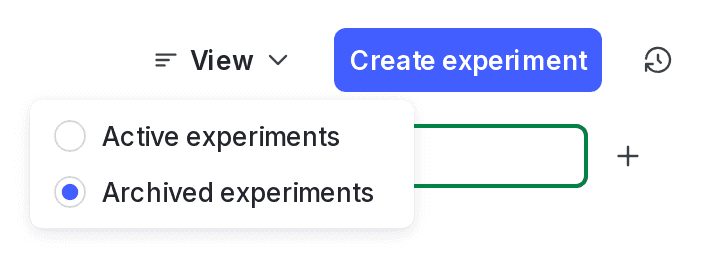
LaunchDarkly hides archived experiments from the Experiments list. You cannot start new iterations for archived experiments.
To archive an experiment:
- Navigate to the Experiments list in the environment you want to archive an experiment in.
- Click on the name of the experiment you want to archive. The experiment detail page appears.
- Click Archive experiment.
To view archived experiments on the Experiments list, click View and select Archived experiments. To switch back to viewing active experiments, click View and select Active experiments.
To restore an experiment, click Restore experiment from the experiment details page.
Experiments and experiment settings are specific to single environments. If you want to run the same experiment in different environments, you must create and run the experiment in each environment individually.
You can also use the REST API: Patch experiment