Sleuth
Read time: 3 minutes
Last edited: Dec 14, 2024
The Sleuth integration is only available to customers on select plans. To learn more, read about our pricing. To upgrade your plan, contact Sales.
Overview
This topic explains how to use the LaunchDarkly Sleuth integration.
The Sleuth integration was built by and is managed by Sleuth. For questions about the integration or for technical support, contact Sleuth.
The LaunchDarkly Sleuth integration tracks feature flags as a source of change in your DevOps tools. Sleuth captures the full state of your LaunchDarkly feature flags at deployment time. This helps you keep track of the affected code deploys, what environment the change occurred in, who changed the flag, and flag descriptions and values before and after code deploys.
Prerequisites
To connect Sleuth to LaunchDarkly, you must meet the following prerequisites:
- You must have access to your LaunchDarkly credentials and
- A LaunchDarkly account with a Writer, Admin, or Owner role.
The integration is initiated from your Sleuth account. After you connect it, you do not need to take further action. There are no Sleuth settings or preferences to configure in LaunchDarkly.
If you get a notification that the integration is connected, but cannot access deploy data in Sleuth, confirm that your LaunchDarkly role allows you to enable external apps. If you are a Reader, or have a custom role that restricts these permissions, the integration may not work.
Set up the Sleuth integration
To connect the Sleuth integration with LaunchDarkly:
- Log into your Sleuth Dashboard.
- In the left sidebar, click Integrations.
- Click enable in the LaunchDarkly section of the Flags tab.
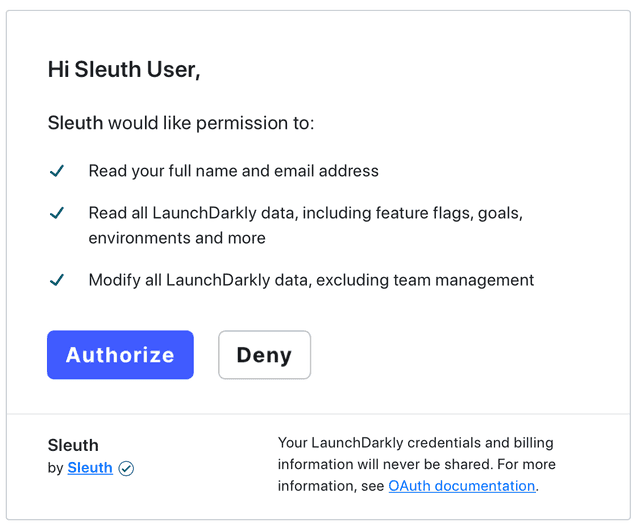
- Click Authorize. This allows Sleuth to read and modify your LaunchDarkly data.
If you click Deny, the integration cannot access your flag data.
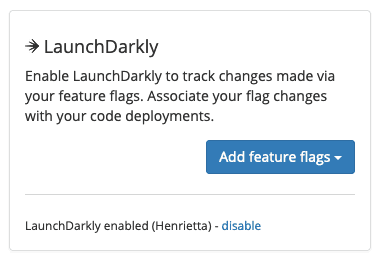
- Confirm that the integration has connected LaunchDarkly and Sleuth when "LaunchDarkly enabled (Connected as user)" is displayed in the LaunchDarkly integration card.
Configure the Sleuth integration
Now that you've set up the Sleuth LaunchDarkly integration, you must configure Sleuth to know which feature flags it should track.
To select a LaunchDarkly project and environment to track:
- Navigate to the Integrations page in Sleuth and find the LaunchDarkly integration section in the Flags tab.
- Click Add feature flags.

- Select the Feature Flag Project and Environment you want to track.
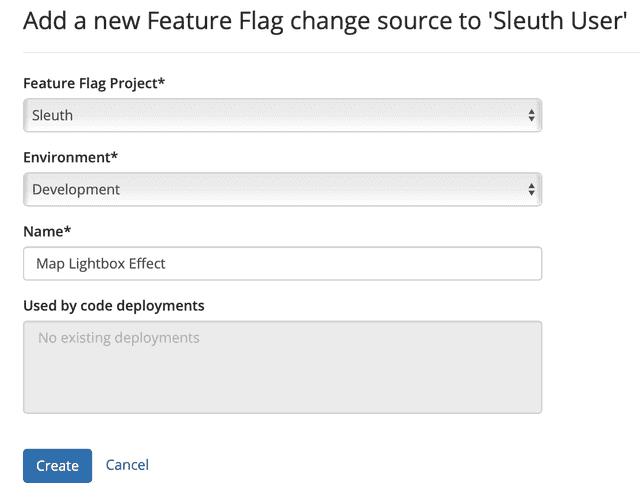
- Give the integration a Name.
- Click Create.
After the connection is established, the Sleuth trend graph appears. This graph monitors how your feature flags impact your code over time.
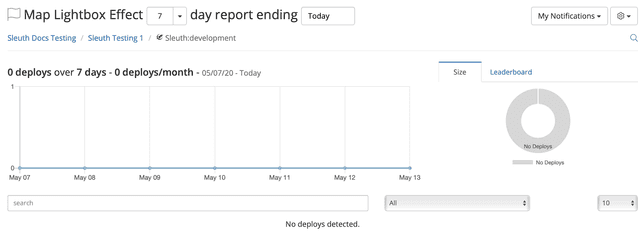
To track multiple LaunchDarkly projects and environments in Sleuth, create a new Sleuth project and attach each LaunchDarkly project or environment to Sleuth individually. You can create as many Sleuth projects as you need to track any number of feature flag project and environment combinations.
To learn more, read Sleuth's documentation.
Remove the Sleuth integration
To remove the Sleuth integration:
- Log in to your Sleuth account.
- In the left sidebar, click Integrations.
- Click disable in the LaunchDarkly section in the Change Sources tab.
- Confirm that the integration has been removed when LaunchDarkly disabled - enable is displayed in the LaunchDarkly integration card.
This removes the LaunchDarkly integration.
Getting Slack notifications from Sleuth
With the Slack integration in Sleuth, you can notify your entire team, or just the commit author or PR initiator, of a code change. This includes feature flag changes.
To learn more, read Sleuth's documentation.
The Sleuth Slack integration works independently from the LaunchDarkly Slack integration. If you use both, you may receive notifications from both Sleuth and LaunchDarkly about flag activity.
To learn more about the LaunchDarkly Slack integration, read Slack.