Release
Read time: 3 minutes
Last edited: Dec 14, 2024
The Release integration is only available to customers on select plans. To learn more, read about our pricing. To upgrade your plan, contact Sales.
Overview
This topic explains how to use the LaunchDarkly Release integration. Release is a product that lets you implement Kubernetes in your cloud and create production-like environments on pull requests or for quality assurance (QA), sales environments, and more.
The Release integration was built by and is managed by Release. For questions about the integration or for technical support, contact Release.
Release's LaunchDarkly integration creates an isolated LaunchDarkly environment to use for testing. You can share your feature flag environments with multiple staging or pre-production environments, but this can cause testing and reliability issues similar to the risks of sharing a database between environments.
The Release integration prevents these issues by creating a new LaunchDarkly environment every time you deploy a new Release environment. It deletes the LaunchDarkly environment when you remove the Release environment.
The integration also stores SDK keys, mobile keys, and client IDs as environment variables that your application can access. If you are not using environment variables in your LaunchDarkly project, you must modify your code to do so in order to use this integration.
Prerequisites
To complete this procedure, you must have the following prerequisites:
- Have a Release account.
- Have a personal or service API access token. To learn more, read API access tokens.
Configure the integration
To configure the LaunchDarkly integration, you must add it to your Release account and connect it to LaunchDarkly.
To set up the integration:
- Log in to your Release account.
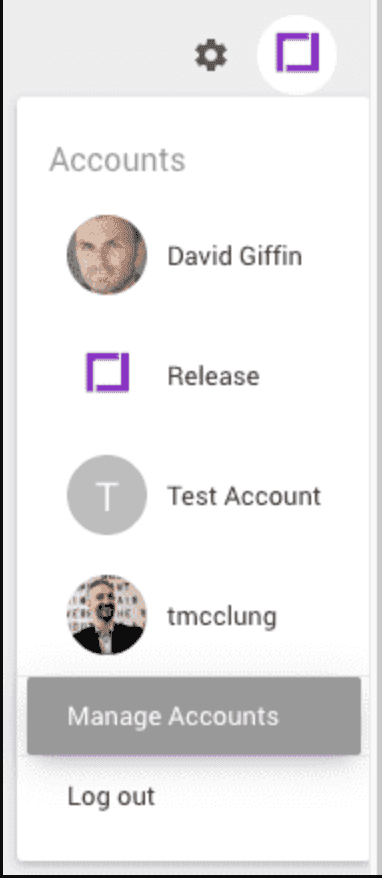
- Navigate to Manage Accounts.
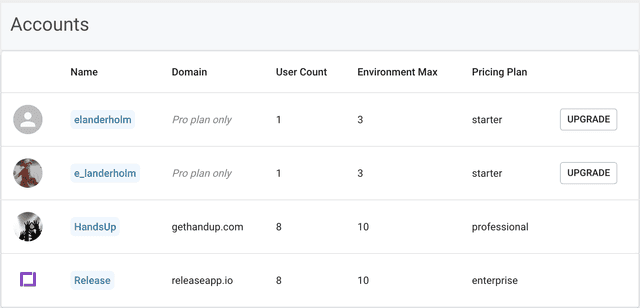
- Choose your account.
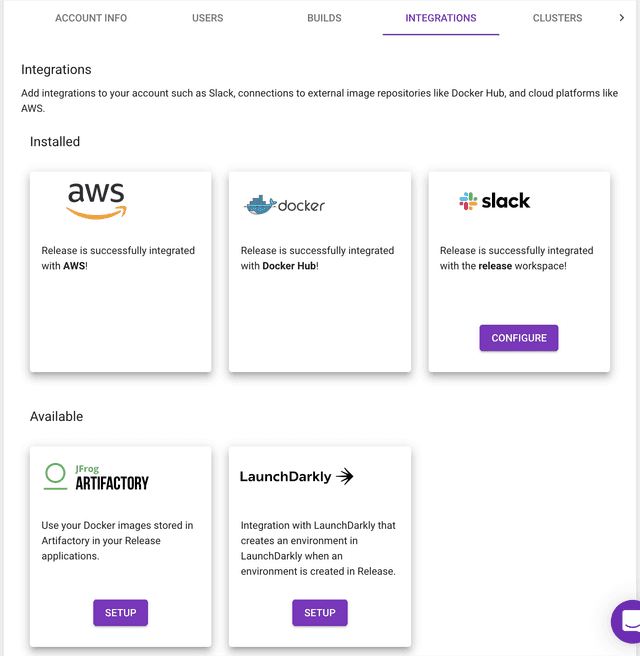
- Choose Integrations and find "LaunchDarkly" in the "Available Integrations" section.
- Click Setup. The setup form appears.
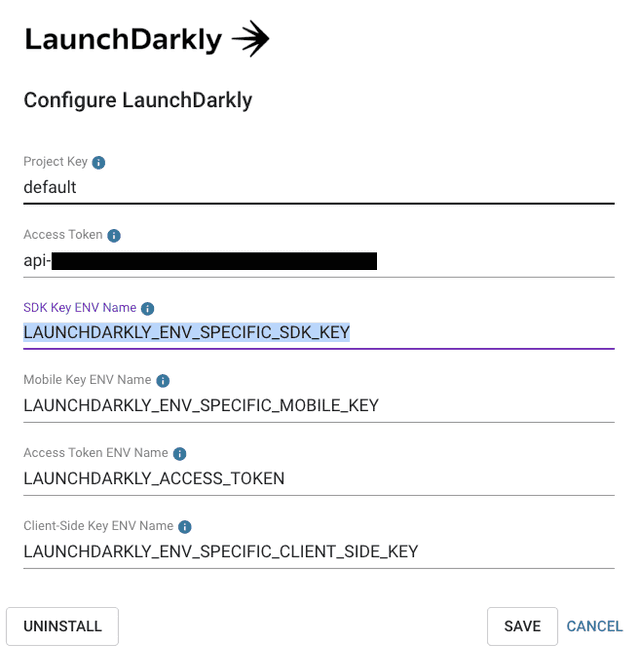
Every field in the setup form is required, and all but one have defaults you can use.
The fields in the setup form are:
- Project Key: This is the key for the project where you wish to create environments. The default value is default, because LaunchDarkly always has a project with key default.
- Access Token: This is the API access token for the account under which you would like Release to create environments in LaunchDarkly.
- Environment Variables: The last three form elements define the names of the environment variables where Release stores the API keys from LaunchDarkly. You can change them to anything you like. Release uses these environment variables to store API keys as Kubernetes secrets.
After you save the configuration, Release uses the API access token to connect to your LaunchDarkly account.
Use LaunchDarkly with the Release integration
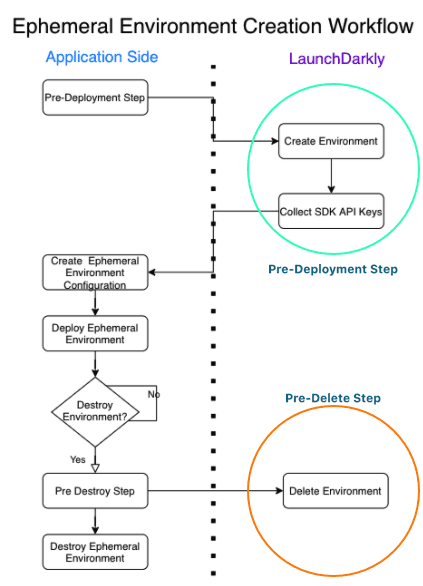
The integration can take two actions, both of which are automated and handled by Release.
- Pre-Deployment step: This step adds a task to each of your deployments to create the feature flag environment.
- Pre-Delete step: When you delete an environment, this step deletes the environment in LaunchDarkly.
The Pre-Deployment step
The Pre-Deployment step occurs when you first deploy a space or a new configuration. It creates the environment in LaunchDarkly only the first time it runs.
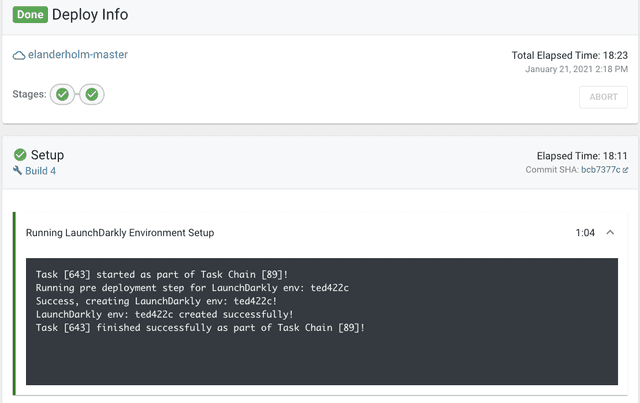
After the Pre-Deployment step, the environment variables you specified populate and become available to your containers.

You can use these environment variables in your code to access your feature flags.
The Pre-Delete step
The Pre-Delete step occurs when a you remove a Release environment, either through the UI or by closing or merging a pull request. Removing the Release environment deletes the corresponding LaunchDarkly environment automatically.
Conclusion
Now that you have successfully installed the integration, the environment variables you defined are available to your app. How you access them depends on the framework or language you are using.
For examples of environment variables in different frameworks, read Release's documentation.