Using the Datadog dashboard widget
Read time: 2 minutes
Last edited: Nov 12, 2024
Overview
LaunchDarkly's Datadog dashboard widget lets you pin feature flags to your Datadog dashboards to monitor and toggle flags from within Datadog. This allows you to manage feature releases in individual environments while monitoring your application performance, without needing to switch between applications.
You can use the widget to organize, monitor, and toggle your flags on and off. You can filter flags by attributes such as project, environment, or tags. Additionally, you can employ a Datadog template variable to ensure the contents update with the rest of your Datadog view.
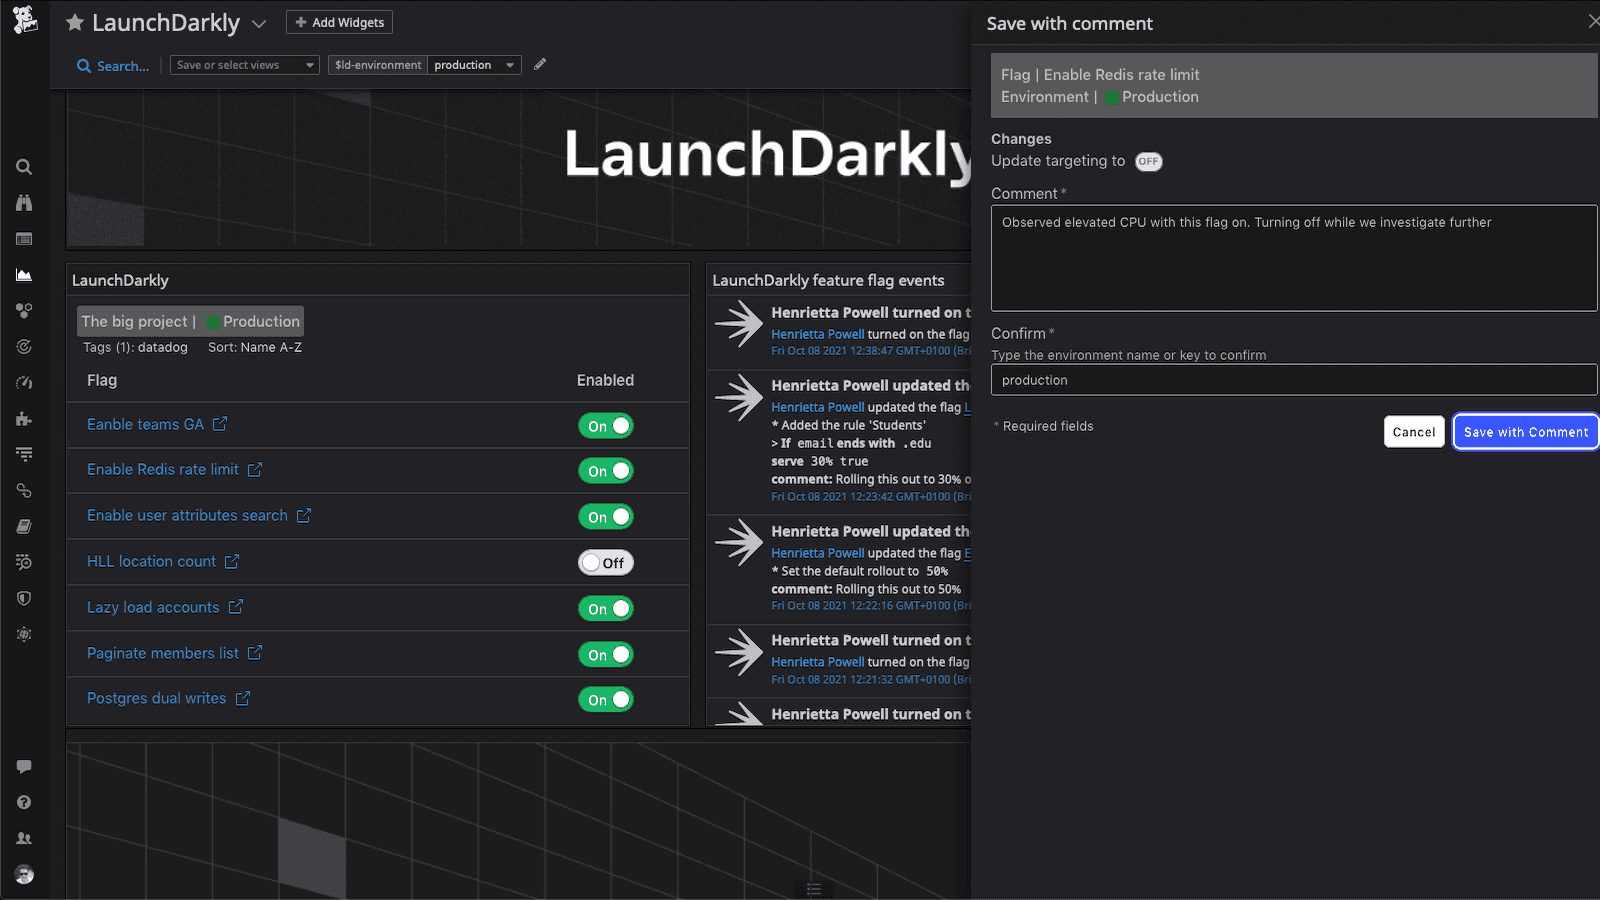
The Datadog dashboard widget uses the same permissions set for an account member's Datadog and LaunchDarkly accounts. When using a shared dashboard, account members can view and edit flags based on their permissions within the LaunchDarkly app.
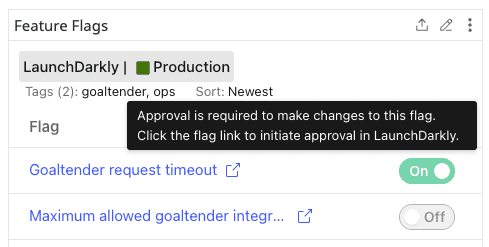
You cannot use the widget to toggle feature flags in environments that require approval. Instead, click on a flag name to open the flag's Targeting tab within LaunchDarkly and toggle the flag from there.
The toggle is disabled when a flag is in an environment requiring approvals:
Install the Datadog widget
To install the Datadog widget:
- In Datadog, navigate to the Integrations page.
- Search for LaunchDarkly or go directly to the LaunchDarkly listing.
- Click Install.
Add the widget to a dashboard
To add the widget to your dashboard:
-
In Datadog, navigate to an existing dashboard or create a new one.
-
Click Add Widgets. The widget drawer appears.
-
Search for LaunchDarkly.
-
Click or drag the LaunchDarkly widget icon to your dashboard. The LaunchDarkly editor dialog appears.
-
Click Connect. A new window appears prompting you to authorize Datadog.
-
Click Authorize. You are returned to Datadog.
-
Configure the following widget options in the LaunchDarkly editor:
- LaunchDarkly project: The name of the LaunchDarkly project you wish to associate with the dashboard widget.
- LaunchDarkly environment: The name of the LaunchDarkly environment you wish to associate with the dashboard widget.
- Environment template variable (optional): A Datadog template variable that overrides the LaunchDarkly environment option.
- LaunchDarkly tag filter: An optional
+separated list of tags used to filter the feature flags displayed in the widget. If multiple tags are included, only flags that match all included tags will appear. If omitted, all of the project's feature flags will appear. - Sort: The order the flags are displayed in the widget. Defaults to Newest.
-
(Optional) Enter a widget a title.
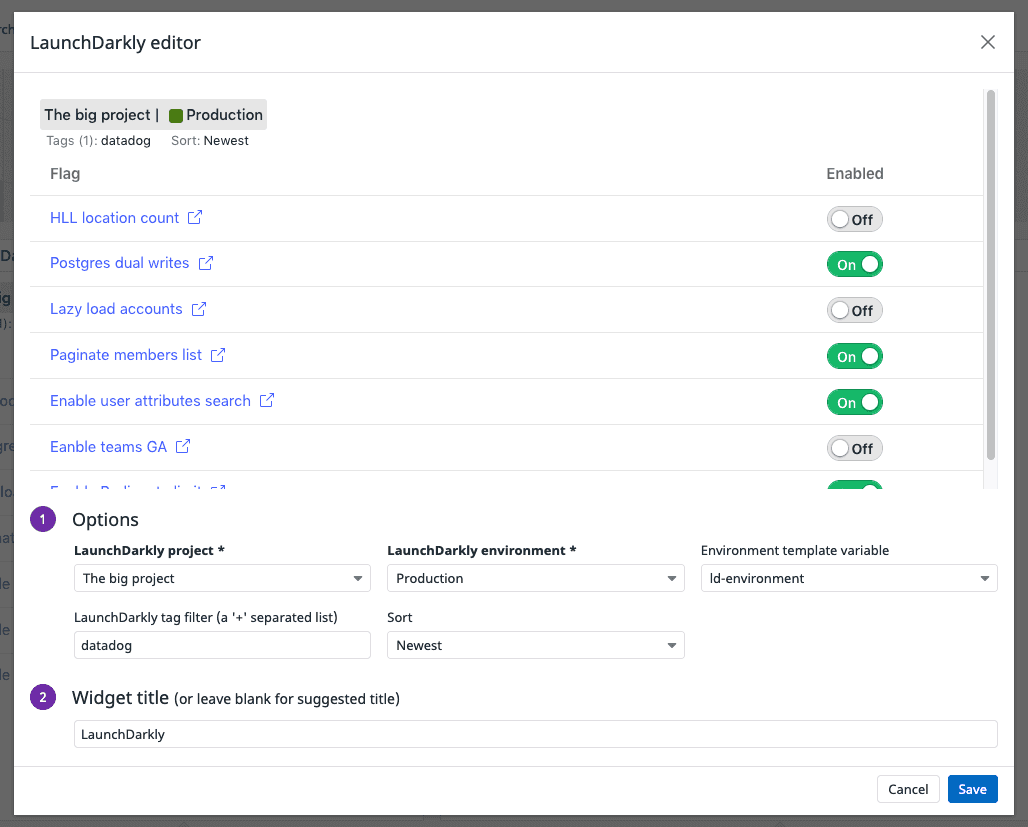
- Click Save.