AWS CloudTrail Lake
Read time: 5 minutes
Last edited: Dec 14, 2024
The AWS CloudTrail Lake integration is only available to customers on select plans. To learn more, read about our pricing. To upgrade your plan, contact Sales.
Overview
This topic explains how to configure and use CloudTrail Lake integration for LaunchDarkly.
The CloudTrail Lake integration lets you configure CloudTrail to receive any activity from LaunchDarkly and then store data in a CloudTrail Lake. When something changes, such as a feature flag updates or a new account member is added to LaunchDarkly, LaunchDarkly sends an event to CloudTrail.
In a few steps, you can consolidate your LaunchDarkly activity events together with AWS activity events in CloudTrail without having to build or manage the event data pipeline.
Set up the CloudTrail integration in LaunchDarkly
To connect CloudTrail Lake to LaunchDarkly, you need to configure the LaunchDarkly CloudTrail Lake integration to send events to a CloudTrail Channel to be stored in a CloudTrail Lake.
To configure the integration:
- Navigate to the Integrations page and find "AWS CloudTrail Lake."
- Click Add integration. The "Create AWS CloudTrail Lake configuration" panel appears.
- (Optional) Give your integration a human-readable Name.
- Click on the auto generated External Id value to copy it.
- Navigate to the Configure the LaunchDarkly integration in AWS section in this documentation and follow the steps to create a "Channel ARN" with the external ID.
- Enter the channel ARN into the Channel ARN field. You created this channel ARN in the previous step.
- (Optional) Configure a custom policy to control which events LaunchDarkly sends to CloudTrail. To learn more, read Filter the events you send to CloudTrail.
- After reading the Integration Terms and Conditions, check the I have read and agree to the Integration Terms and Conditions checkbox.
- Click Save configuration.
The new integration appears on the Integrations page. It is switched On by default.
Configure the LaunchDarkly integration in AWS
An external ID is required to configure the integration in AWS. Follow the steps outlined in the Set up the CloudTrail integration in LaunchDarkly section to obtain an external ID from LaunchDarkly.
- In the AWS Console, go to the CloudTrail dashboard and expand the Lake section on the side navigation.
- Click on Integrations.
- Click the Add integration button. The Add integration page appears.
- Enter your integration name and select the "LaunchDarkly" option from the Source menu.

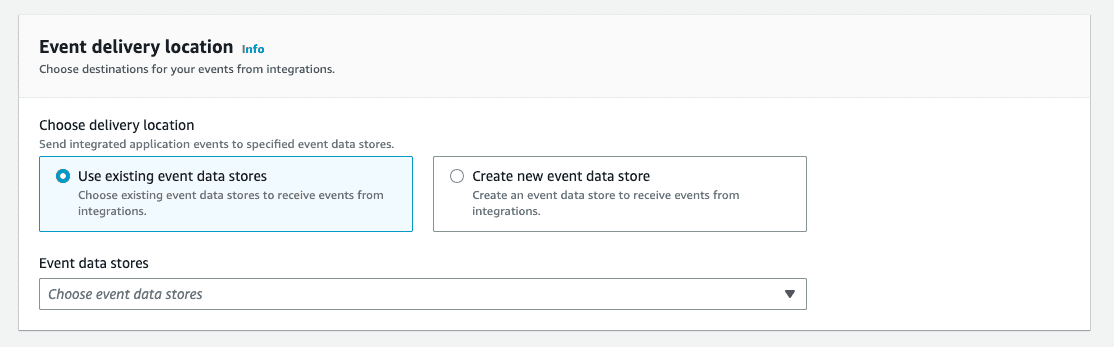
- Scroll down to the Event delivery location and select a destination for your events from LaunchDarkly. You can choose to use an existing data store or select "Create new event data store."
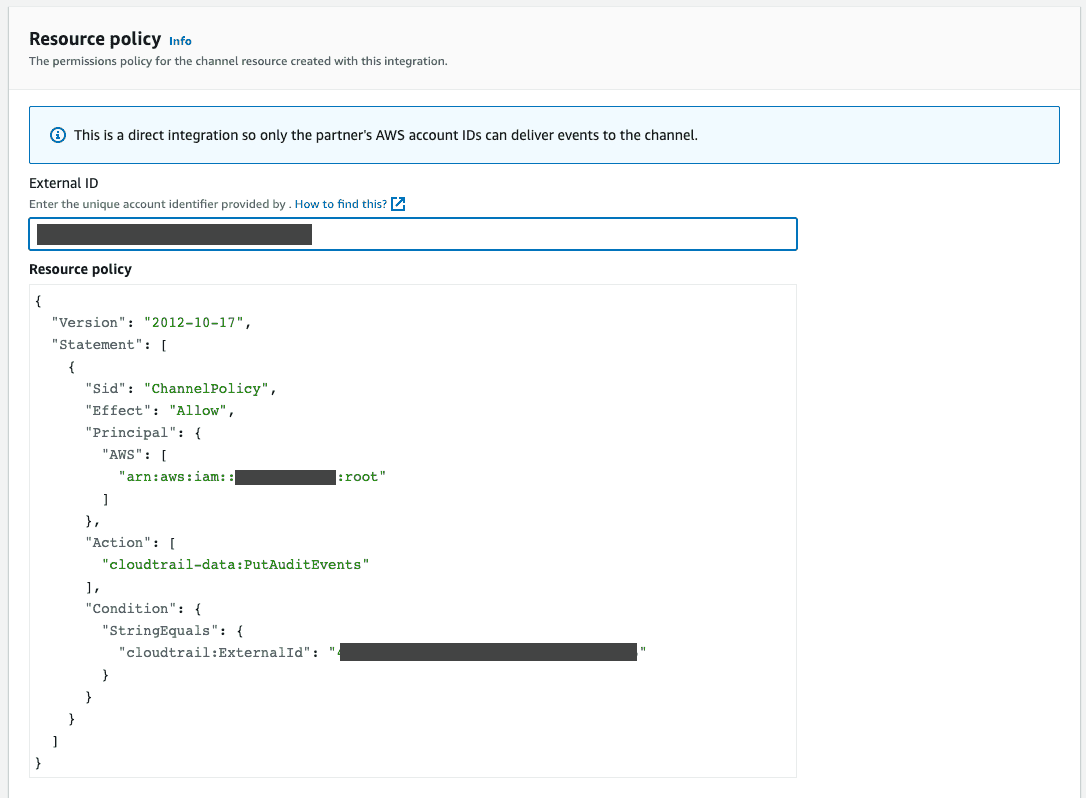
- Scroll down to the Resource Policy section and enter the LaunchDarkly external ID into the "External ID" field. LaunchDarkly created the external ID automatically when you set up the CloudTrail integration in LaunchDarkly.
- Click the Add integration button. The Console navigates to the created integration's detail page.
- Copy the Channel ARN. You need this ARN to create to complete configuring the integration in LaunchDarkly.
- Follow the steps outlined in the Set up the CloudTrail integration in LaunchDarkly section to complete your setup.
For detailed instructions on how to set up CloudTrail, read the AWS CloudTrail documentation.
Filter the events you send to CloudTrail
By default, LaunchDarkly sends events to CloudTrail for changes made to any feature flag in a production environment. If you have a more limited use case, or you wish to expand or restrict which data you send to CloudTrail, you can filter which events LaunchDarkly sends.
To filter events, write a policy using the same syntax as the custom roles feature to filter the events sent to CloudTrail.
For more information about writing policies, read Policies in custom roles.
For example, if you only want to receive an event when a change is made to one of the feature flags in your testing environment, you can add the following policy to your events stream:
To add a custom filter:
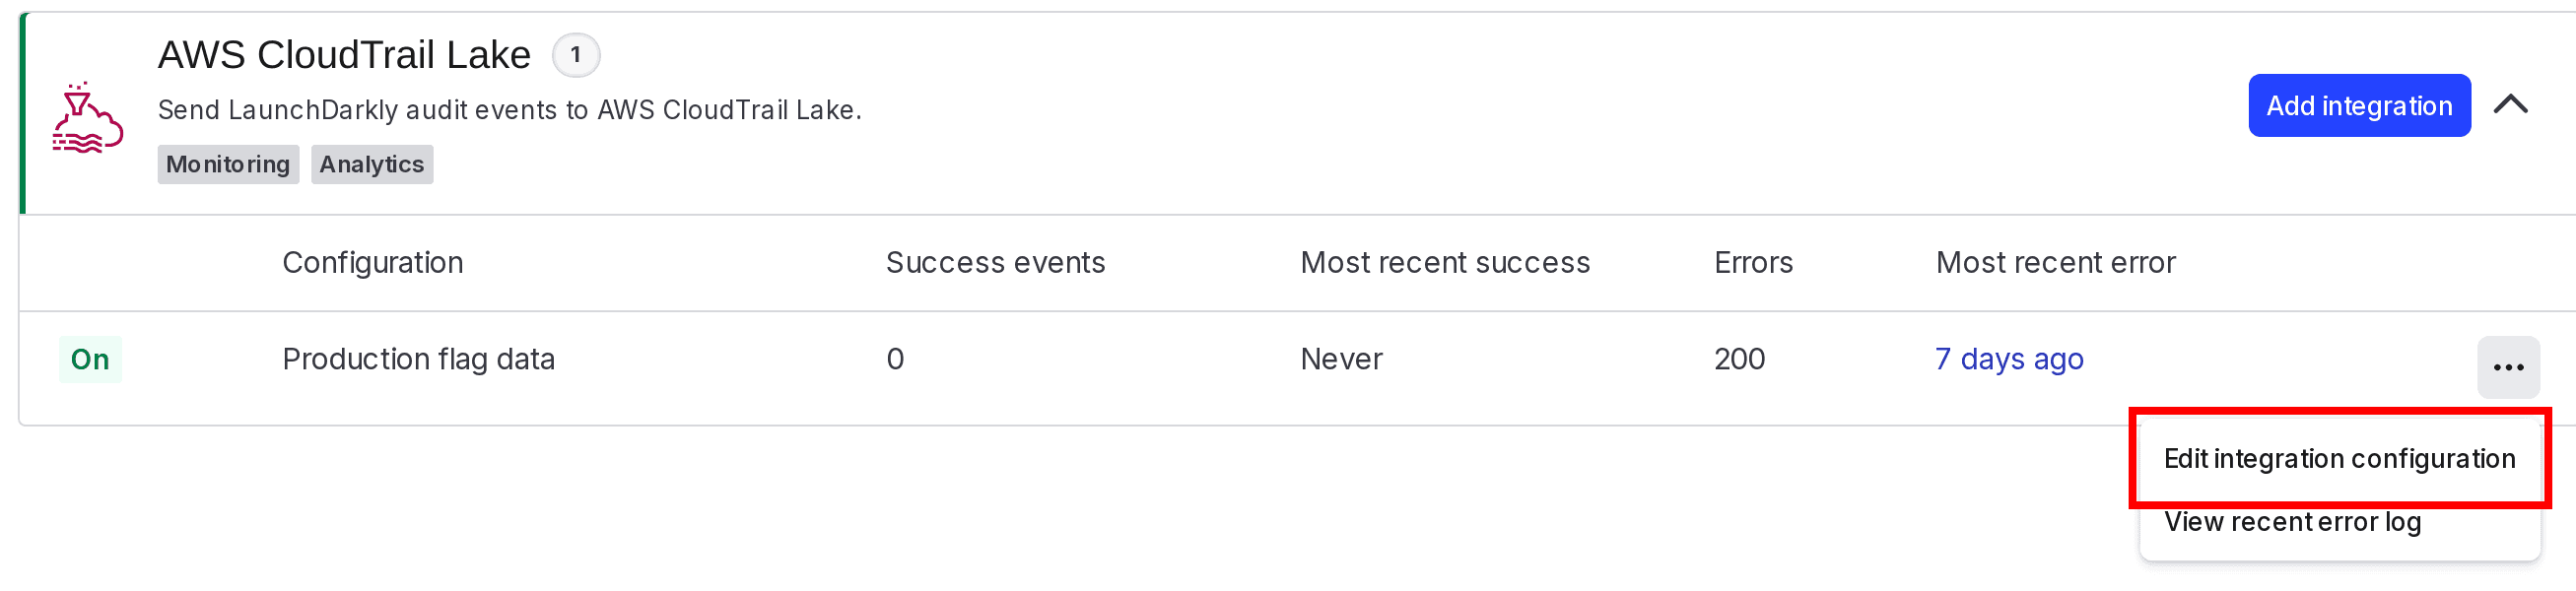
- Navigate to the Integrations page and find "AWS CloudTrail Lake."
- Click the Expand arrow.
- Next to the configuration you want to edit, click the Overflow menu and select Edit integration configuration. The "Edit AWS CloudTrail Lake configuration" panel appears.
- Click Advanced editor. The Advanced editor appears.
- Enter your custom policy.
- Click Save configuration.
- Verify that LaunchDarkly is sending a customized set of events by viewing the events in CloudTrail Lake.
Disable the CloudTrail Lake integration
The steps below only disable the integration in your LaunchDarkly account. To learn how to delete the integration in your AWS account, read the AWS CloudTrail documentation.
You can either disable or delete the CloudTrail Lake integration:
- Disable the integration to pause the flow of events to CloudTrail, but leave the connection between CloudTrail and LaunchDarkly intact.
- Delete the integration to cease all event export and break the connection between CloudTrail and LaunchDarkly.
To temporarily disable the CloudTrail Lake integration:
- Navigate to the Integrations page and find the CloudTrail Lake integration you wish to disable.
- Click the Edit integration configuration button. The "Edit AWS CloudTrail Lake configuration" panel appears.
- Toggle to turn the integration Off.
To permanently delete the CloudTrail Lake integration:
- Navigate to the Integrations page and find the integration you wish to modify.
- Click Edit integration configuration. The "Edit AWS CloudTrail Lake configuration" panel appears.
- Click Delete in the "Delete configuration" section. A confirmation dialog appears.
- Click Delete.