Azure DevOps
Read time: 5 minutes
Last edited: Dec 14, 2024
The Azure DevOps integration is only available to customers on select plans. To learn more, read about our pricing. To upgrade your plan, contact Sales.
Overview
This topic explains how to use Azure DevOps integration to control feature flags.
The Azure DevOps integration lets you perform controlled rollouts to manage feature releases. With this integration, you can define a percentage rollout for your feature flags as part of a release task.
Currently, this integration only supports boolean flags. To learn more, read Flag templates.
Prerequisites
To complete this procedure, you must have the following prerequisites:
- The Azure extension from the Azure DevOps Marketplace. Before you add the extension to any of your Azure DevOps projects, you must first add it to your Azure DevOps organization.
- If your organization has not installed the extension, click Get it free on the Marketplace listing. Then, add the LaunchDarkly extension to your Azure DevOps project so the extension can connect to your LaunchDarkly account.
- A personal or service API access token. To learn more, read API access tokens.
Set up the Azure extension
To set up the VSCode extension, you must complete the following steps:
- Give your API access token the required permissions:
- You can create a custom role with appropriate permissions, then add the custom role to a personal or service access token, or
- you can add the built-in Writer role to your personal access token.
- Configure the Azure extension with the API access token.
Give your API access token the required permissions
You can create a custom role with appropriate permissions then add the custom role to a personal or service access token, or you can add the built-in Writer role to your personal access token.
Create a custom role and add it to an API access token
Expand Create a custom role and add it to an API access token
Service tokens and custom roles are only available to customers on select plans. To learn more, read about our pricing. To upgrade your plan, contact Sales.
To create a custom role for the API access token:
- Click the gear icon to view Organization settings.
- Click Roles.
- Click Create role. The "Create custom role" panel appears.
- Give the custom role a human-readable name.
- Grant write access to the environments and feature flags relevant to your Azure DevOps projects.
- Click Save role.
Add the built-in Writer role to your personal access token
Expand Add the built-in Writer role to your personal access token
To add the built-in Writer role to a personal access token:
- Click the gear icon to view Organization settings.
- Click Authorization.
- Find the personal access token you want to add permissions to and select "Edit token" from its overflow menu. The "Edit" panel appears.
- In the Role menu, select "Writer."
- Click Save token.
Your personal token now has the Writer role.
Configure the Azure extension
To configure the Azure extension:
- Navigate to your Azure DevOps project dashboard. Click Project Settings.
- Navigate to Pipelines, then Service Connections.
- Click Create service connection and select LaunchDarkly.
- Enter your LaunchDarkly API Access token.
- Enter a Service connection name.
- (Optional) Enter a Description.
- Click Save.

Create the rollout task
The next step is to add the rollout task to your release definitions.
You cannot associate rollouts with collections that are not the default. If you do, the rollout won't be able to find the collection.
To find the rollout task:
- Navigate to the Add tasks dialog in Azure DevOps.
- Click into the Deploy tab.
- Choose LaunchDarkly Rollout.

- Choose the Account to update. This menu contains the service endpoints you configured in Configure the Azure extension.
- Set a percentage Rollout to apply to your feature flags.
- Choose the Flag state. This controls whether the targeting is on or off on release.
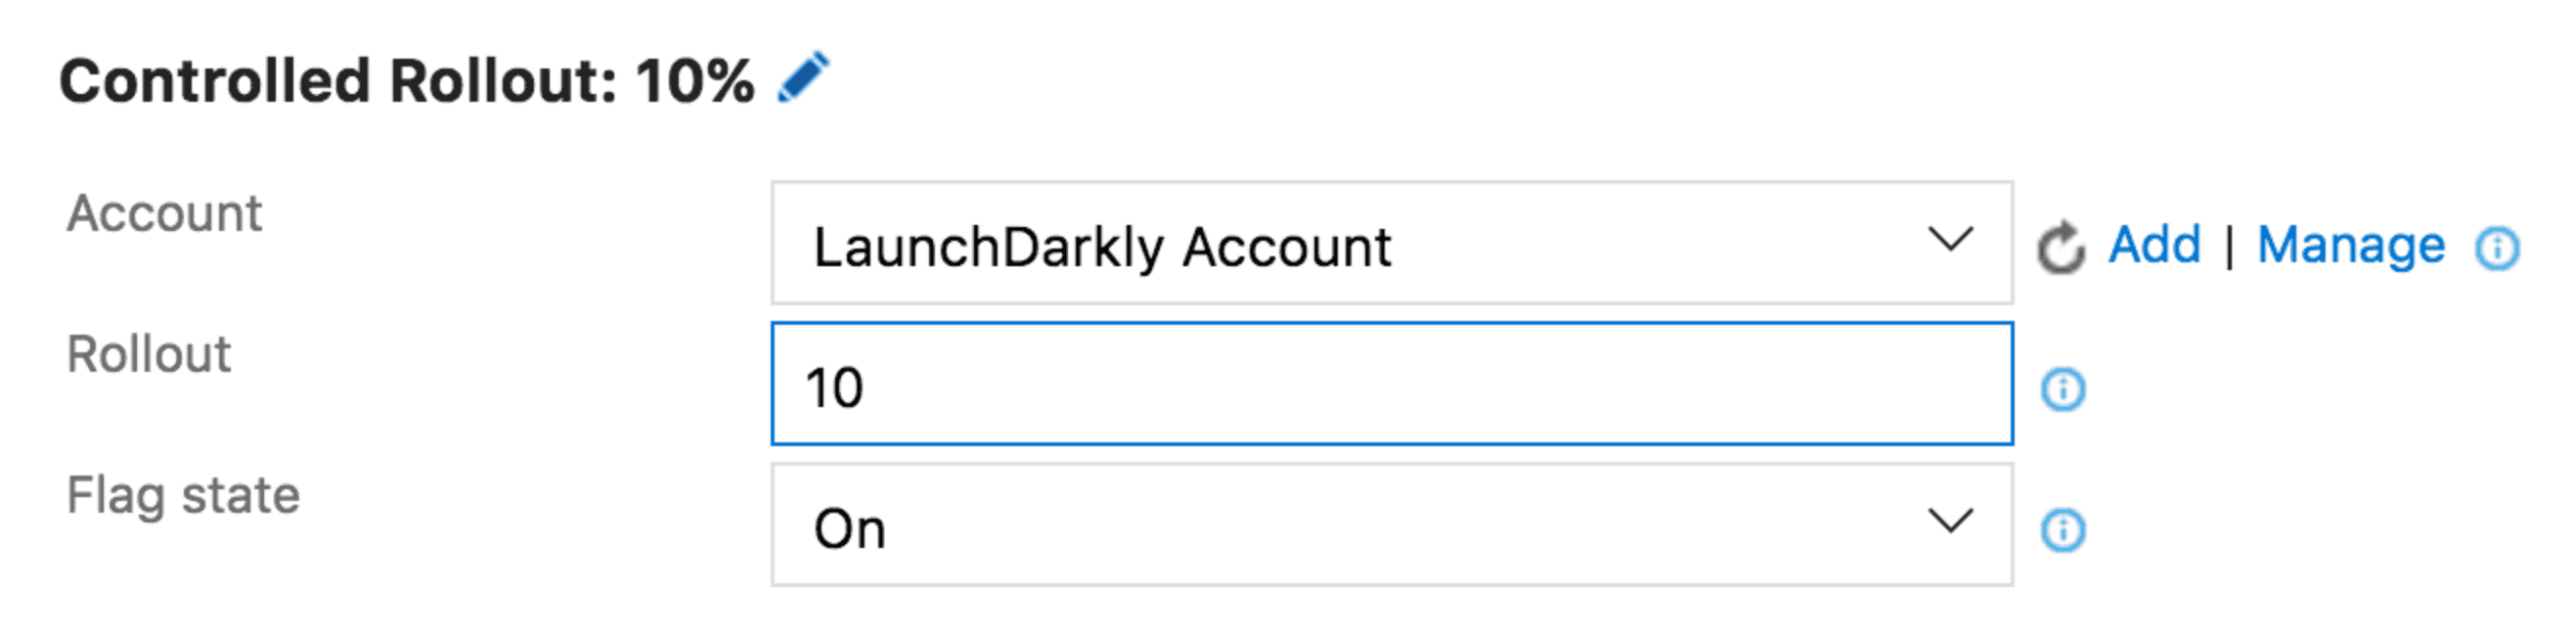
In this example, any feature flags associated with the release are set to be rolled out to 10% of your chosen contexts in the LaunchDarkly environment you select.
Associate a feature flag with a release
To associate a feature flag with a release:
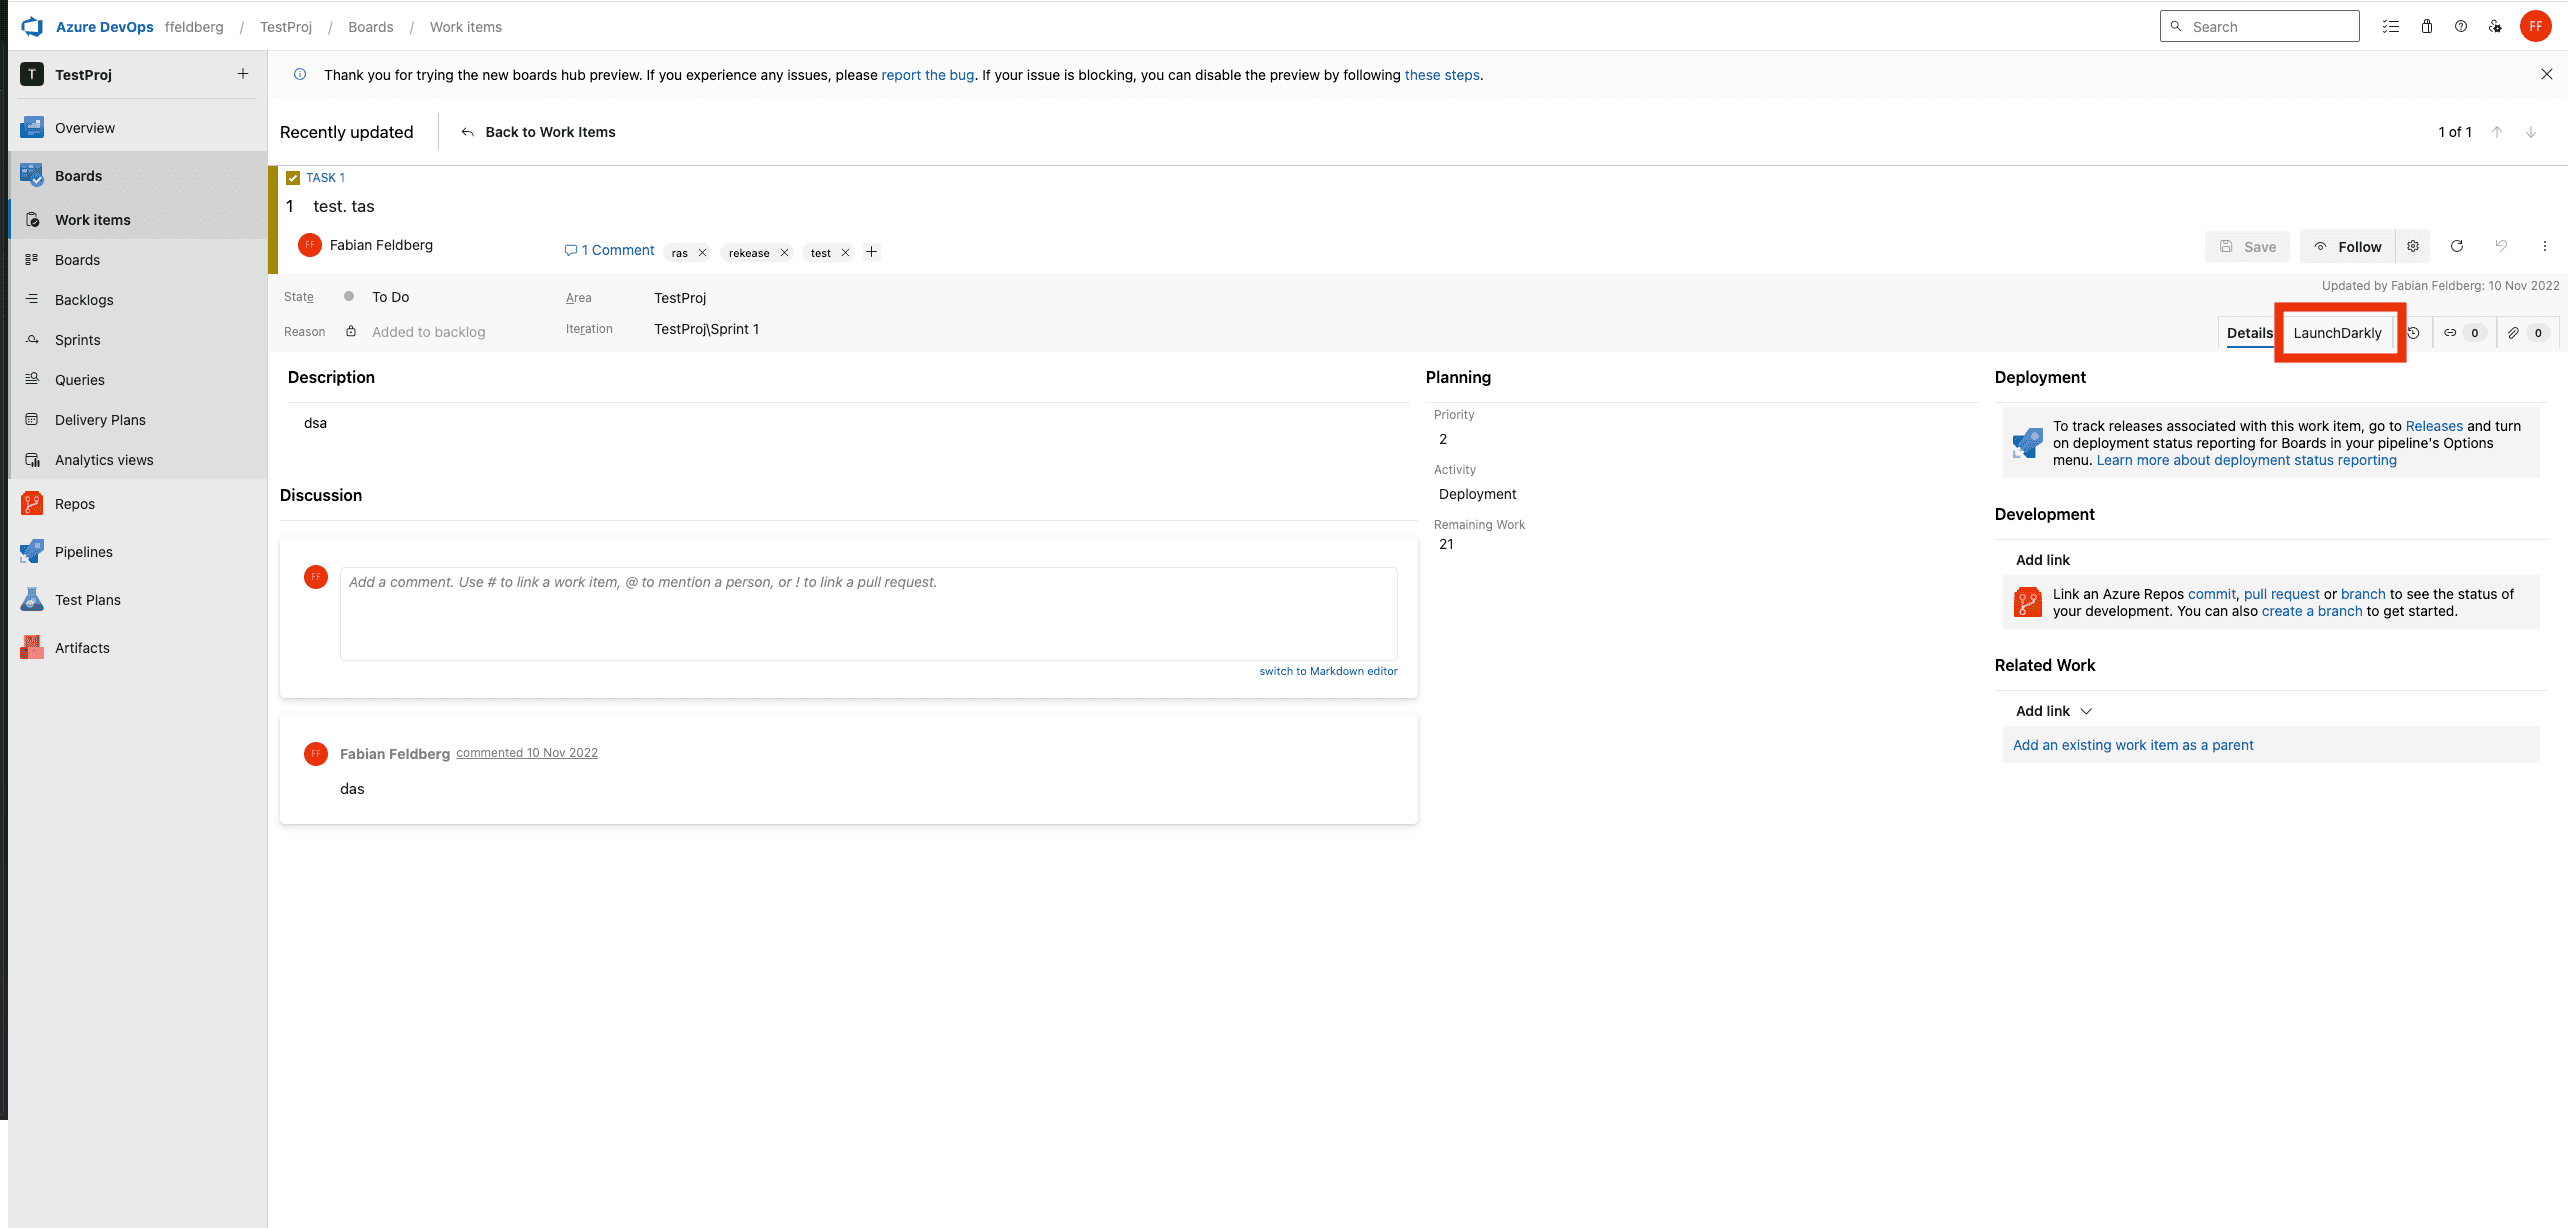
- Navigate to the "Work items" page in Azure DevOps.
- Select the "LaunchDarkly" tab to view the feature flags associated with an item on the "Work items" page:
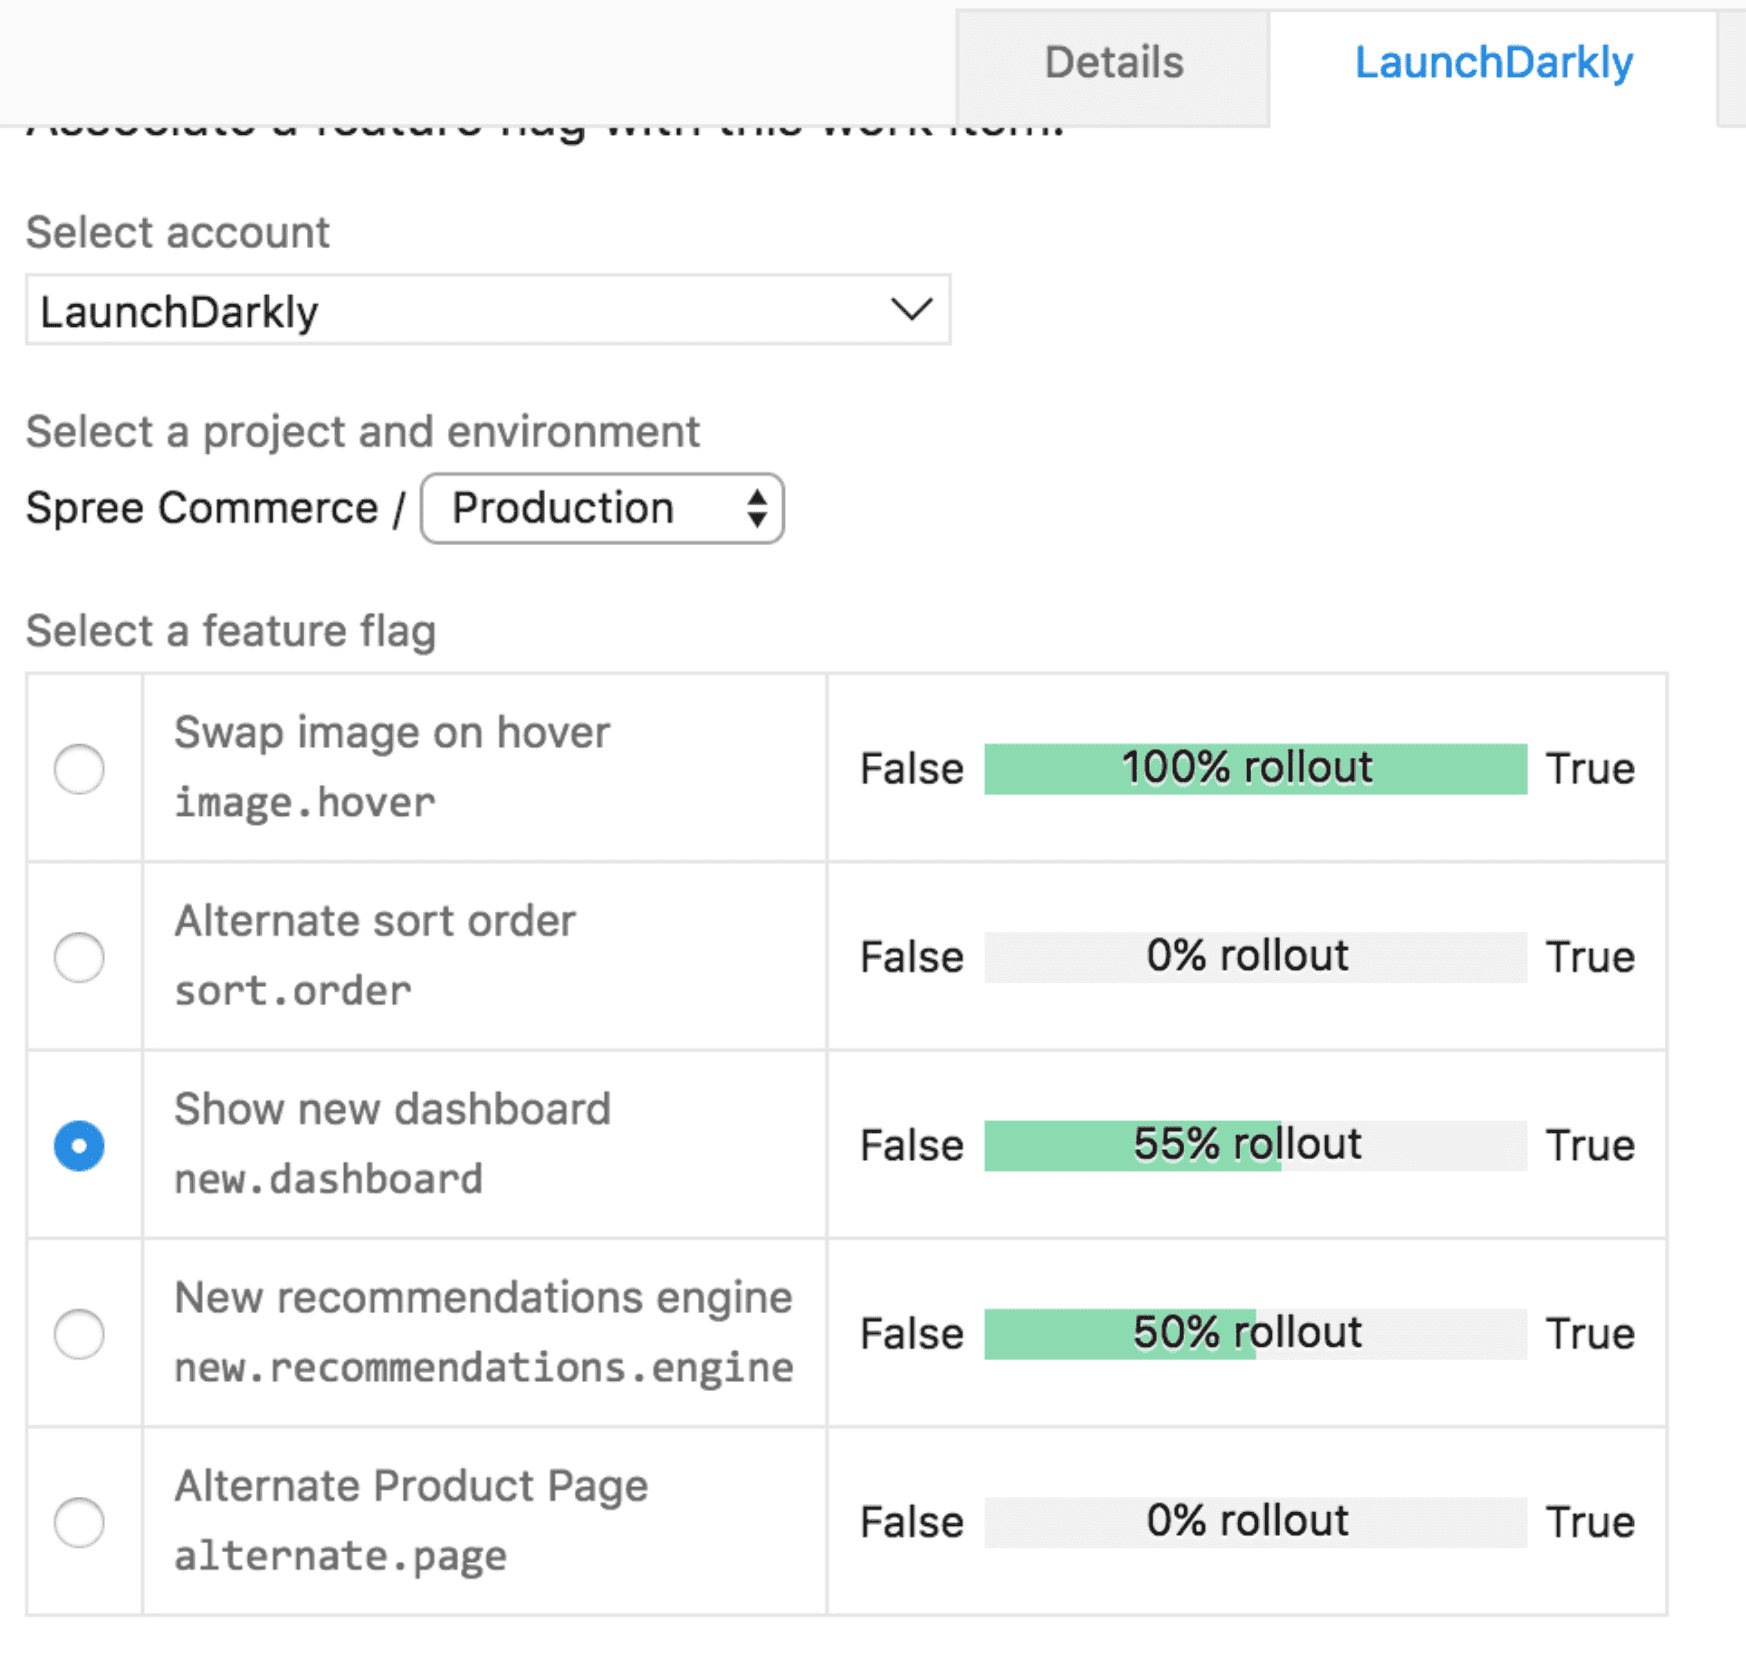
- On the "LaunchDarkly" tab, select the feature flag to associate with a release:
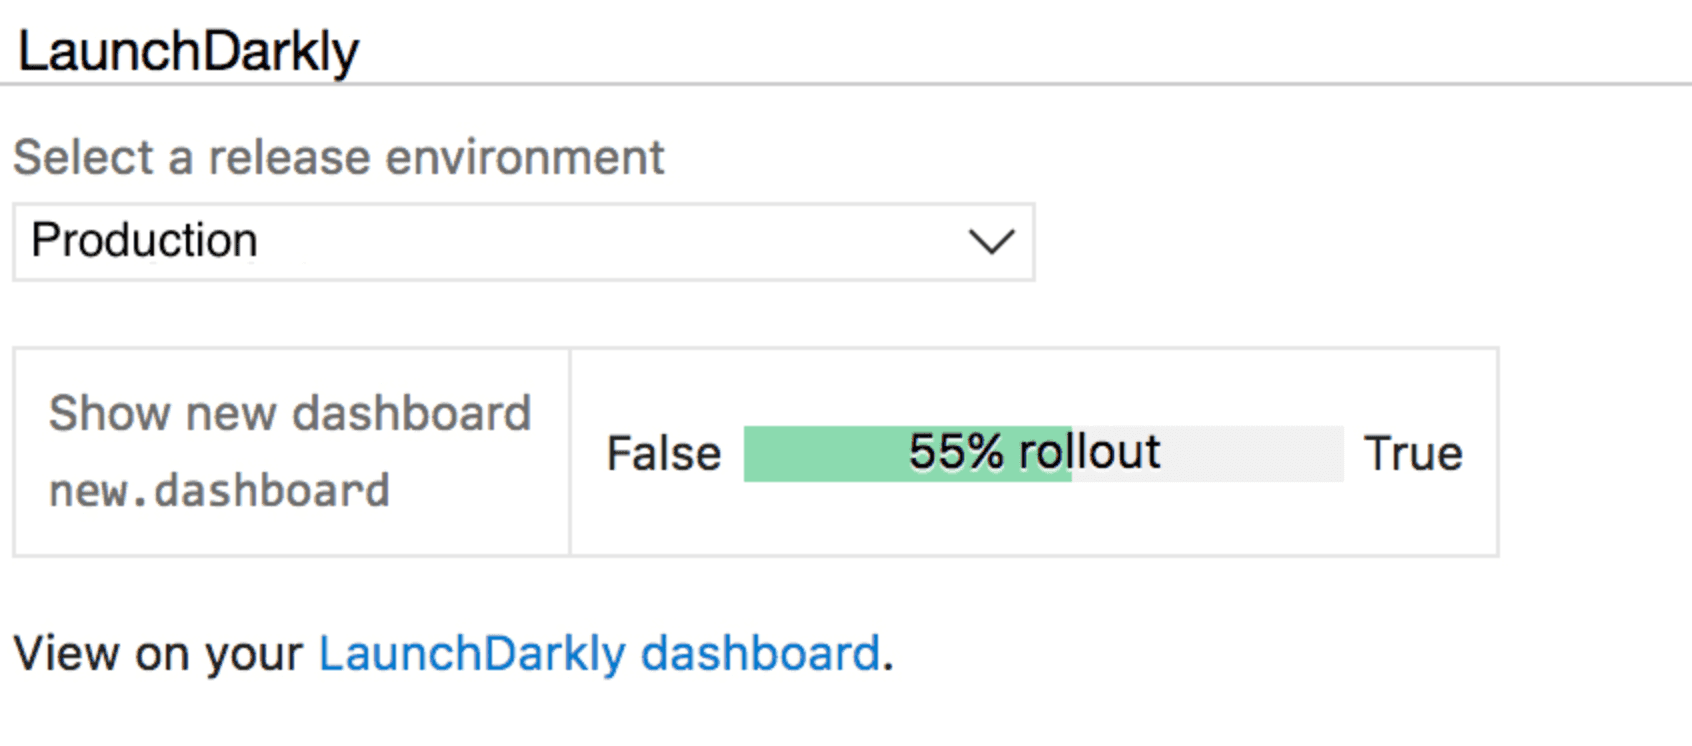
When you release to an environment, the rollout task updates any flag you linked with a work item.
This also updates the LaunchDarkly section on your release page. It shows all the feature flags affected by this release:
For the rollout task to succeed, you must link the relevant work items to the release. To learn how, read the Azure Devops documentation on how to Link work items to objects.
Configure authentication
To ensure the task can access your work items, you must allow Azure DevOps to authenticate with LaunchDarkly. This process differs based on which version of the integration you are using. If you don't know which version of the integration you are using, you are probably using the v3 version.
v3 of the Azure DevOps integration
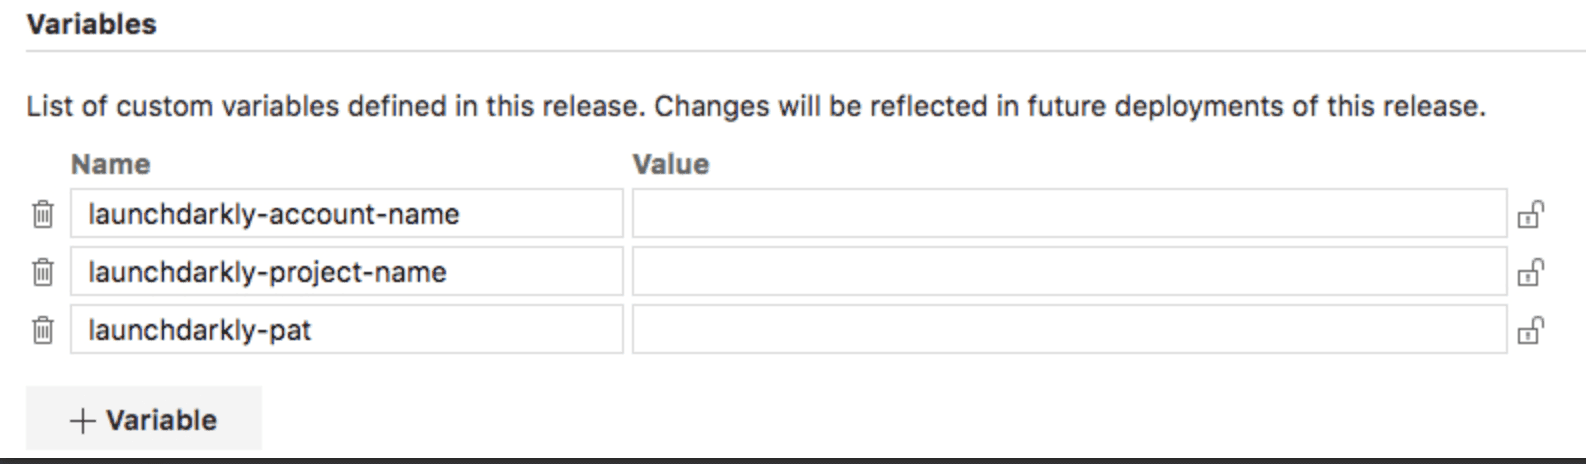
To configure authentication, define some custom variables to pass between Azure DevOps and LaunchDarkly:
- Navigate to the Configuration tab of the release page in Azure DevOps.
- Enter the launchdarkly-account-name. This is account name of the Azure DevOps account.
- Enter the launchdarkly-project-name. This is the project name of the Azure DevOps project.
- Enter the launchdarkly-pat. This is for the Azure DevOps personal access token that the integration will use to reach out to the Azure DevOps API.
Pre-v3 versions of the Azure DevOps integration
To configure authentication, define some custom variables to pass between Azure DevOps and LaunchDarkly:
- Navigate to the Configuration tab of the release page in Azure DevOps.
- Enter the accountName.
- Enter the alternatePassword.
- Enter the alternateUsername.
- Enter the projectName.